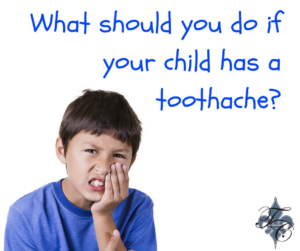
What should you do if your child has a toothache

We all know that toothaches are incredibly unpleasant, ranging from mild discomfort to incredibly painful. Some people will wait until the pain is absolutely unbearable before getting to a dentist, taking over-the-counter medications and trying to ignore it in the meantime.

Other people will get to a dentist at the first sign of any dental distress. Bottom line, adults are going to handle it however they see fit (although you really should be seeing a dentist straightaway). But what do we do when it’s our child with the toothache?

Causes and symptoms of a toothache

The first step to being able to treat a toothache at home is knowing exactly what symptoms your child is experiencing. Typically, toothaches can include the following:

  • Pain that is dull, sharp, throbbing, constant, or any combination of these
  • Swelling of the gums around the affected tooth
  • Headache
  • Fever
  • Foul-tasting drainage from infected tooth

These symptoms are often the result of:

  • Erupting teeth
  • Tooth decay
  • Fractured tooth
  • Food stuck between the teeth or in the gum line
  • Excessive chewing or tooth grinding
  • Damaged filling
  • Infected gums

At home toothache treatment

Once you know what the symptoms are, there are a number of ways you can ease your child’s discomfort until you are able to get him/her to a dentist:

  • You can mix a teaspoon of salt with a cup of warm water, and have them swish it around their mouth, then spit it out (if they’re old enough).
  • An oral anti-inflammatory will help with the pain as well.
    • If you can, use a liquid, as a chewable pill may be difficult when a toothache is involved.
  • A cold compress on the cheek by the sore area will help reduce pressure and swelling.
    • Ice cubes have hard edges and may further aggravate the area, so use a malleable, cold gel-style compress. Make sure to protect your child’s skin with a towel as well – you don’t want their skin getting too cold.
  • Clove oil is another option, as it acts as a topical analgesic.
    • If you do use clove oil, be very careful, as essential oils are strong when undiluted. Alternatively, you can pick up an over-the-counter, child-safe, toothache medication that contains clove oil.

Get them to the dentist

While these things may help your child feel some measure of relief, you’ll want to get them to a dentist rather quickly. Does your child have a tooth that is bothering them? Come see Dr. Chauvin!

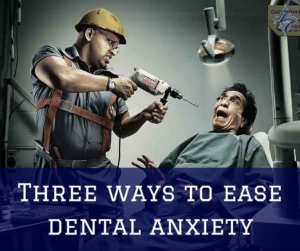
Three ways to ease dental anxiety

Are you afraid of going to the dentist? Some people simply schedule their appointment and go get it over with without a second thought! However; if you’re someone who will put off an appointment until the absolute last second, and when you finally do schedule one you dread it for weeks? You may have a dental phobia.

Well you aren’t alone. Up to 75% of people have a slight feeling of fear about dental visits! And more severe, afflicting anywhere from 9-20% of the population, are the people who avoid the dentist unless absolutely necessary.

The good news is, there are some things you can do to help ease your dental anxiety.

Bring someone with you

A familiar face, such as a close friend or relative, in the room can do a lot to ease your troubled nerves. Having someone to talk to will keep you from dwelling on your fears and keep you distracted. Make sure it’s someone who knows how you feel about the dentist, and has no fear of the dentist themselves. You don’t want to bring someone along only to have them say “I’m terrified of the dentist! I can’t stand the drill!” That’s not going to help very much.

Distract yourself in the chair

Most dentists allow you to wear headphones while they’re working on your teeth, so take advantage of it! You can listen to some music, although don’t put anything too familiar on – you may find yourself tuning it out. Comedy albums help a lot as well – not only do they give you something else to focus on, they’ll amuse you! Another good option are audiobooks. Pick something new and just let the novel take you someplace far away from the dentist’s office.

Talk with your dentist

A lot of people’s fear stems from simply not understanding what happens in the chair, or that they feel a lack of control. Take the time to talk with your dentist about their process! Let them know that you have this fear. They can walk you through everything so you know exactly what’s about to happen. You can also ask them to check with you frequently on whether you can continue or if you need to take a break.

The most important thing you can do is be upfront with your dentist about it. Don’t wait until you’re in the chair and on the verge of the panic attack to say something. Be honest! It’s very common, and your dentist should be more than happy to accommodate whatever requests you have to help you through the experience.

What exactly is Tinnitus?

tinnitus chauvin dental lafayetteDo you suffer from a constant ringing or buzzing in your ears? That is tinnitus. It’s a common misconception that tinnitus is a condition by itself. It’s actually a symptom of something else, like a circulatory problem, or hearing loss due to age. Luckily, it’s just annoying, and often isn’t a sign of a serious issue. It can get worse with time though, so if it becomes unbearable there are things you or your doctor can do to deal with it.

What is tinnitus?

Tinnitus is when you hear phantom sounds, even though there isn’t anything actually making noise, and is characterized by:

  • Ringing
  • Buzzing
  • Hissing
  • Roaring
  • Clicking

The sound’s pitch and volume can be low or high, and can occur in one or both ears. It can also be constant, or come and go. Some people are incredibly bothered by it, and others don’t mind. It all varies from person to person. Regardless of your symptoms, the sound you hear will help your doctor determine the problem.

When should I see a doctor?

If you experience tinnitus after having a respiratory infection, if it comes on with no apparent reason, or if you experience hearing loss or dizziness with the tinnitus, you need to see a doctor to make sure that whatever is causing it isn’t serious.

How is it treated?

To treat, your doctor will first need to determine which kind you have. There are two types of tinnitus: subjective, which only you can hear, and objective, which your doctor can hear. Most people have subjective tinnitus, and it can be caused by problems within your ear, problems with auditory nerves, or problems in the auditory pathways of your brain. Objective tinnitus is rarer, and is caused by muscle contractions, blood vessel problems, or a middle ear bone issue.

Once your doctor determines the root cause of the tinnitus, treatment can begin. If the tinnitus is caused by impacted ears, your doctor will remove the earwax. If it’s caused by a blood vessel condition, you may need medication or surgery to correct the tinnitus. Certain prescriptions can also cause tinnitus, so you may simply need to use a different medication.

If it’s not something that can be treated, there are things your doctor can do to help reduce your symptoms: prescriptions, white noise suppression, masking devices, hearing aids, or tinnitus retraining. These things all help you suppress the sound, and in the case of tinnitus retraining, you learn to ignore it entirely.

If you suspect you have tinnitus, set up an appointment with your doctor just to rule out any serious medical trouble.

Night Guards: Complete cleaning instructions

night guard chauvin dental lafayette laProtecting your teeth and maintaining proper oral health is paramount to a healthy lifestyle. Dental problems can present themselves as a variety of different issues. Take bruxism, or teeth grinding, for example. If you find yourself waking up with headaches or a sore jaw, you may be grinding your teeth at night and not even realize it. The good news is there are some things you can do to help bruxism, such as use a night guard. If you do use a night guard, here are some instructions on how to clean it properly.

How to clean your night guard

Simply rinsing off an item that stays in your mouth all night, every night, is not sufficient to clean it. There are a couple of different ways you can clean your night guard:

  • Toothbrush and toothpaste
    • Use a softer bristle toothbrush and a gentle toothpaste in order to not damage the night guard with any abrasive substances. If the night guard becomes scratched or has pockmarks, bacteria will gather in the grooves and make it more difficult to clean correctly.
  • Soap and water
    • It’s important to not use hot water on your night guard, as it can soften the plastic and cause it to warp. Warm water and a gentle antibacterial soap are best – you can also use a soft bristle toothbrush to gently scrub away any debris.
  • Mouthwash
    • An antibacterial mouthwash is safe to rinse, or even soak your nightguard in. It will kill any lingering bacteria and give the night guard a pleasant taste. Be aware that it may become stained with regular use of a mouthwash – but that won’t affect the functionality.
  • Dental sanitizing devices
    • There are special cases that use antibacterial UV light to disinfect the night guard, however they do not remove any debris so it’s important to still remove that first.

How to store your night guard

Equally as important as cleaning your night guard is proper storage. You may have the most disinfected and spotless night guard in the world, but if it goes into a dirty case, all of that work is wasted. With proper night guard care, you should only need to clean your case once a week. You can use hot water and soap whilst cleaning the case. It’s also important to make sure your night guard is completely dry before going into the case, and that you keep the case in a cool dry place.

If you have concerns about teeth grinding and wish to be fitted for a custom night guard, set up an appointment with Dr. Chauvin!


Benefits of dental sealants

There is no replacement for taking proper care of your teeth. However, it can be difficult to get children to brush and floss as much as they should, which is why they are more susceptible to cavities. Since our adult teeth can come in as early as six years of age, it’s very important to take care of them, as we will have these teeth for the rest of our lives. Fortunately, there is an additional measure of protection parents can choose to put on their children’s teeth: dental sealants.

What is a dental sealant?

A dental sealant is simply an additional layer of protection that can be placed on children’s teeth. It’s made of a very common dental composite that is resin based, bis-GMA (bisphenol A-glycidyl methacrylate). This is often the same material used for cavity fillings. It bonds micro-mechanically to properly prepared teeth, providing a lasting hold that actually strengthens the teeth it’s attached to. The process is simple:

  1. Teeth are cleaned of all plaque and food deposits
  2. A tooth is dried
  3. Then etched – which creates tiny irregularities that make it easier for the resin to bond to it
  4. It is rinsed and dried again
  5. The sealant is applied
  6. A self-curing light is used for thirty seconds to harden the resin
  7. And the process is repeated until all teeth are finished

When should their teeth be sealed?

Once the final permanent tooth erupts. The American Academy of Pediatric Dentistry says that using a sealant “has shown a reduction of cavities’ incidence [by] 86 percent after one year and 58 percent after four years.” So it’s important to have it done quickly after the child has all of their permanent teeth for maximum protection, typically around age six.

How long does it last?

If the child takes proper care of their teeth, the sealant can last as long as ten years! Chips, wear, and tear will happen as time goes on, but a dentist can repair any chinks in this particular armor. It’s a simple matter of reapplying the sealant to the affected tooth. For this reason, it’s important to maintain your regular dental check-ups, twice a year.

Adults that don’t have decay or fillings in their molars can also have their teeth sealed! It’s a wonderful way to keep your teeth healthy and prevent cavities. If you are interested in having your or your child’s teeth sealed, set up an appointment with Dr. Chauvin!

nitrous oxide chauvin dental lafayette dentist louisiana

How Nitrous Oxide works

nitrous oxide chauvin dental lafayette dentist louisianaIf you’ve ever had any dental work done, especially as a child, you’re probably familiar with nitrous oxide. On its own, the gas can be fatal. When mixed with oxygen (typically at a ratio of 30% nitrous oxide and 70% oxygen) it becomes N2O-O2, more commonly known as laughing gas.

How does nitrous oxide work?

Nitrous oxide is administered via a small facemask that covers the nose. Sometimes the mask is scented (typically for children) to give the otherwise undetectable gas a pleasant odor. The easiest way to describe the effects of the gas is that it gives the patient a “happy drunk” feeling. After breathing in the gas for around five minutes, you experience a euphoric feeling throughout the body. It can also make you feel light-headed, and make your limbs feel weighed down, but not in an unpleasant way. People often get the giggles, hence the “laughing gas” moniker.

After light-headedness, depending on how much gas is administered, the patient will descend through the following levels of sedation:

  1. Tingling or vibrating sensations in the limbs
  2. Warmth
  3. Euphoria or floating (the patient’s hearing may dissolve into distant throbbing)
  4. Sleepiness and difficulty speaking

If you begin to feel nauseous, you’ve been over-sedated. If at any point do you feel unpleasant sensations, tell your dentist. They can adjust to N2O-O2 dosage and make you feel better, or even remove the mask to dispel some of the effects.

Uses of nitrous oxide:

It is primarily used for partial sedation, but can double as an anaesthetic, as N2O deadens virtually all sensation, including pain! In fact, it’s so effective at minimizing pain that it is often used instead of gumline injected anaesthetics. It also inhibits some emotional response, which is why it can be used to calm down people (and children) who are incredibly afraid at the dentist.

It works quickly, reaching your brain in under thirty seconds. Within five minutes, you’ll be optimally sedated. It is easy to adjust the dosage, so if a patient is somewhat resistant to the effects, or is feeling badly, necessary changes can be made quickly in order to minimize discomfort.

Another reason it’s so popular for dental procedures is there are no aftereffects. Once the gas is turned off, all effects are removed from the body in a matter of minutes. You can even drive after laughing gas!

If you’re in need of any dental work, come see Dr. Chauvin!

symbol of dentistry chavin dental lafayette la

Do you know the meaning behind the official symbol of dentistry?

symbol of dentistry chavin dental lafayette laThe symbol of dentistry, a staff with a snake coiled around it, flanked by leaves, inside a triangle, surrounded by (and intertwined with) a circle, and on a purple background. Chosen in 1965, the symbol has been around for over 50 years. It looks cool, but what in the world does it stand for?

As with many things, the symbol has its origins in mythology. Enter Asclepius – one of the earlier gods associated with health. Asclepius was a son of Apollo (who you may recognize as the god who drives the chariot across the sky each day, bringing the sun with him). Apollo was known for healing, among other things.

Asclepius was primarily known for his healing abilities, and his symbol was a staff entwined with a snake. Believed to have taken the form of a serpent, the story goes that Asclepius healed the Greek people that were suffering from a Roman plague.

Although snakes have a negative connotation today, from a mythological standpoint, the snake was a creature of rebirth. They saw the shedding of its skin as  a rejuvenation, a healing. You’ll notice that his symbol is also very similar to the symbol of medicine, the Caduceus; a winged staff with two snakes twirling around it.

Interestingly enough, the serpent has a healing representation in the Old Testament too! Moses made a brass serpent, put it on a pole, and “… if a serpent had bitten any man, when he beheld the serpent of brass, he lived.” (Numbers 21:9) This is also connected to the origins of the Caduceus.

Also appearing on the symbol of dentistry are two branches of leaves with berries on them. This is a very specific reference to the number of teeth people have. There are 32 leaves, for 32 permanent (adult) teeth, and 20 berries, representing primary (children’s) teeth.

The triangle is actually the greek letter Δ, delta, here referring to “dentistry”. The circle is Ο, omicron. Omicron represents “odont” – the greek word for tooth. The two symbols are woven together. The purple color is actually lilac, and was selected as the color of dentistry by the NADF (National Association of Dental Faculties) in 1897.

Symbols and logos are never what they appear to be at face value. Each element is carefully chosen, and with a little digging, you too can discover what they really mean. In the meantime, if you need to see a dentist, give Dr. Chauvin a call!

adult braces dr chauvin lafayette la

What you should know about adult orthodontics

adult braces dr chauvin lafayette laThese days, braces aren’t just for kids. As people are living longer, and advancements in medical and dental health continue, people are choosing to have their teeth corrected with orthodontics. If a person has good dental health, they can get braces – whether they’re twenty years old, or seventy years old!


There are multiple benefits to having braces as an adult:

  • Closing gaps between teeth
  • Fixing over/under/cross-bites
  • Improving their smile
  • Correctly aligned teeth are easier to care for via flossing and brushing

The most important thing to bear in mind when considering braces, good dental hygiene must be maintained, or they’ll cause more problems than they fix. Special care must be taken when a person has braces. Brushing after every meal is a must, and flossing properly will take roughly twenty minutes – also after every meal.

Thankfully, due to advancing technology, braces are no longer the gigantic metal bands that were around in the 80s and 90s. There are a number of options to choose from!


  • Traditional braces:


    • Are much smaller nowadays, which makes them easier to clean and easier for a person’s mouth to adjust to. The orthodontist will tighten the wires every four to six weeks, and adults will typically have these for anywhere from eighteen months to three years.


  • Ceramic braces:


    • Although more expensive, they’re harder to see, as the ceramic is the same color of the teeth.
      • Another option, if the visibility of the braces is a concern, is to have the metal brackets placed behind the teeth. It is important to note that this method is much more costly, as each bracket has to be custom fitted to the back of each tooth. This location also makes the braces more difficult to clean.
  • Clear alignment braces:
    • These can be removed for eating and teeth cleaning, but they tend to take longer than traditional braces. They’re meant for minor adjustments. If a large tooth gap is an issue, than metal braces are the way to go


  • Veneers:


    • A veneer is a thin layer of ceramic that cosmetically corrects any chipped or stained teeth, without actually moving anything around. Another thing to consider is the cost, as the dentist may need to shave some of the existing tooth to make the veneers look right.

If a person is considering braces, they should talk to their dentist about the options. They can make a recommendation based on the current state of their teeth, and refer a good orthodontist in the area. Need more information? Call Dr. Chauvin!


Getting a root canal over existing dental work

tooth-anatomy-762x812There are a variety of reasons where a person may need to have a crown on their tooth. Maybe some trauma caused a tooth to crack, or they had a root canal. A person may also have a crown if they had a cavity that was in an area that was too difficult to fill via traditional methods. Regardless of the reason, they have a shiny new crown in place, and some time goes by. Then that tooth starts to hurt again… What does that mean?

There are a few things that could have happened. If the crown didn’t seal properly, bacteria may have gotten under the crown, causing additional damage or cavities. Trauma, such as a fall, sports injury, or traffic accident, can also damage or displace a crown. This would also allow bacteria to get into the underlying tooth and tissue. The end result being that a root canal is required.


What happens if there is already a crown and a root canal is needed?


The dentist will assess the situation and consider a variety of factors before proceeding:


  • Is the crown seated properly?
  • Is it intact?
  • What is causing the pain?
  • Can the crown be salvaged?


If the crown is seated properly and everything is intact, the dentist will be able to perform a root canal or cavity filling through the existing crown, and simply patch the crown when he’s finished. If the crown is damaged or hasn’t sealed properly, the crown will be removed. Replacing the crown will depend on whether or not there is enough remaining tooth structure to support a crown.

It’s important to remember that, while porcelain, crowns are not invincible. Proper dental care is required if a crown is going to last more than a few years. Although they will wear down over time, a crown should last many years before needing a replacement. Cavities can happen to crowns (because there is tooth beneath them), so make sure to brush after meals and floss daily. The edges where the crown meets the gum line, or margins, of the crown are especially susceptible to wear and tear. Make sure to get proper care instructions from the dentist after having a crown put in.

Be sure to notify the dentist if a crowned tooth begins to hurt. Any bacteria that get in under a damaged crown will be impossible to remove via brushing, flossing, and mouthwash. They will continue to eat at what’s beneath the crown until a dentist rectifies the situation, either via a simple cavity filling or a root canal. Having tooth pain? Give Dr. Chauvin a call!

What is a water flosser?

water flosserDo you find yourself forgetting to floss some days? You’re not alone. Just half of Americans floss daily, and 18.5% don’t floss at all. Even if we don’t always remember to do it, flossing is an important part of our daily routine. Floss gets to places between your teeth and in the spaces between your teeth and gums your toothbrush can’t reach. But is dental floss your only option?

Water flosser – what is it?

A water flosser, sometimes called a water pick, is an oral irrigator. That means it’s a cleaning device that shoots a thin stream of water, and when aimed between your teeth or at the gumline it can remove food particles and plaque on or between your teeth. The most popular version is made by Waterpik.

Oral irrigation tools are also more effective ways to irrigate pockets ob plaque between the sides of teeth and the inside of the gums, because they flush out bacteria without making the gums bleed.

Who should use a water flosser?

  1. People with gum disease and bleeding gums
    • If you have some hard to clean areas that continue to bleed despite good flossing, water flossers can be a great way to clean these problem areas. Water flossers clean these areas with persistent gum inflammation well enough to see a noticeable reduction in inflammation and bleeding, which is the goal of treatment to address gum disease.
  2. People with braces
    • Water flossers are great for those with braces who tend to get more food particles stuck in their teeth. Not only does that feel gross and irritating, it increases your risk for cavities when you don’t clean them out.
  3. People that always get food stuck in their teeth
    • Some people just get more food stuck in their teeth than others. It probably has more to do with the shape of your teeth. People with small gaps where their teeth and gums meet are more likely to have that problem. It can also happen when you’re teeth aren’t perfectly aligned. That’s usually due to genetics, and those rotated or crowded teeth can create pesky food traps. Food can also get stuck around some dental work like bridges and dental implants, and water flossers can be a big help to clean these harder to reach places.

How to use a water flosser

8 Simple Steps for Using a Water Flosser

  1. Fill the reservoir with lukewarm water and place it on the base, pressing down firmly to ensure full seating.
  2. Select the tip and press firmly into the handle.
  3. If this is the first use, set the pressure control dial to high. Point the tip into the sink and turn on until water flows. Turn unit off.
  4. Adjust the pressure control (start at low pressure)
  5. Lean over the sink and place tip in mouth.
  6. Turn unit on. Close lips to prevent splashing, while allowing water to flow from mouth into sink.
  7. Start with the back teeth and pause briefly between teeth, aiming the tip just above the gumline at a 90 degree angle.
  8. When finished, turn unit off and use the tip eject button to remove the tip.